> For the complete documentation index, see [llms.txt](https://docs.aime.app/llms.txt). Markdown versions of documentation pages are available by appending `.md` to page URLs; this page is available as [Markdown](https://docs.aime.app/aime-live/quickstart-user-guides/getting-started.md).
# Getting Started
Steps for installing the AIME Live app and the onboarding process
## Installing the App
Navigate to the AIME Live store page on the Shopify App Store.\
\
Click on the '**Install'** button on the left-hand side and a new tab will open within your Shopify Admin.
On this page a list of areas the app needs to access will be outlined. To agree and continue to installation process click the '**install'** button at the bottom right-hand corner.
Once the app is installed, we recommend '**pinning'** it to your sidebar navigation for easy access. To pin the app, hover over 'AIME Live' in your left sidebar and click on the pin icon sitting next to it.
Alternatively, you can use the search bar at the top of the page to search for AIME Live when you need it.
***
## Onboarding Process
AIME Live creates hyper-personalised recommendations for your stores online shopping experience and these appear in what we call ***Blocks.*** The design of Blocks can be fully customised to suit your store look and feel and can be placed anywhere you like on your home page and product pages.
In order for your Blocks to be added and show properly on your store, the AIME Live app needs to be activated via the Shopify Theme Editor.
### Activate App Embed
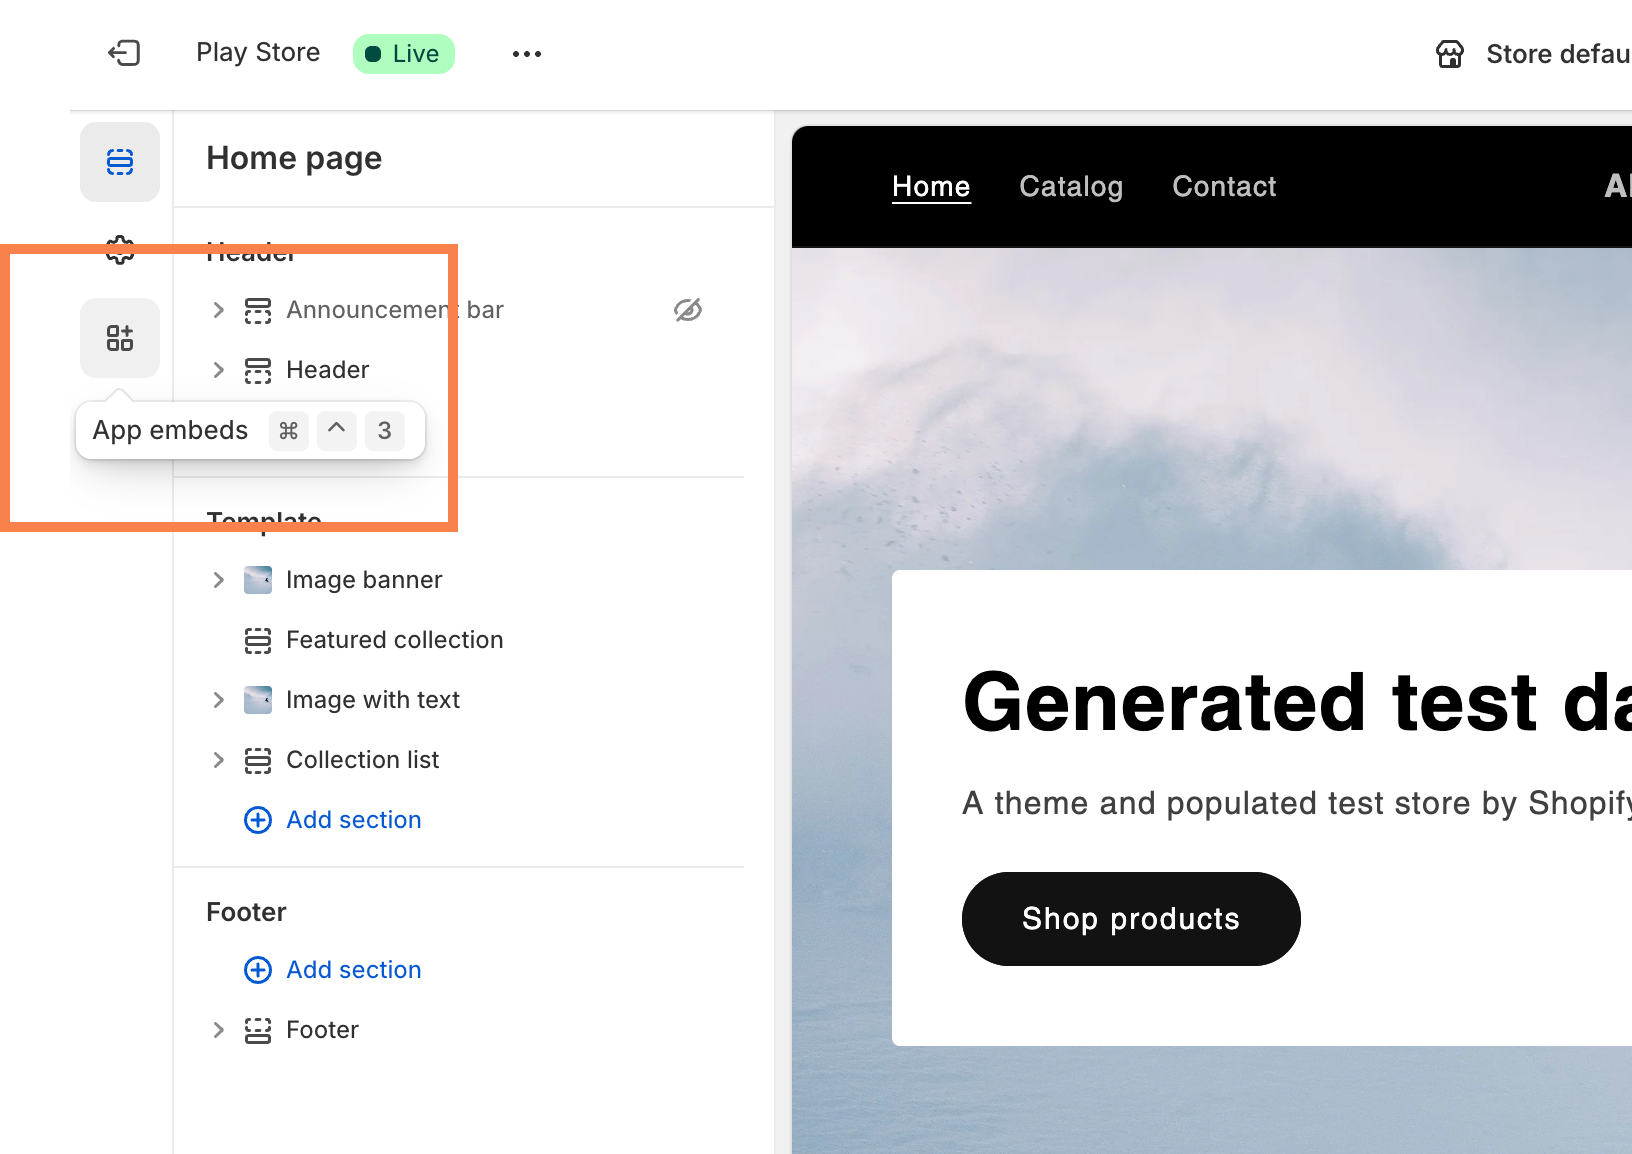
1. Open your store’s Theme Editor (Shopify Admin > Online Store > Themes > Customise) and click on the ‘**App Embeds**’ tab in the left sidebar.
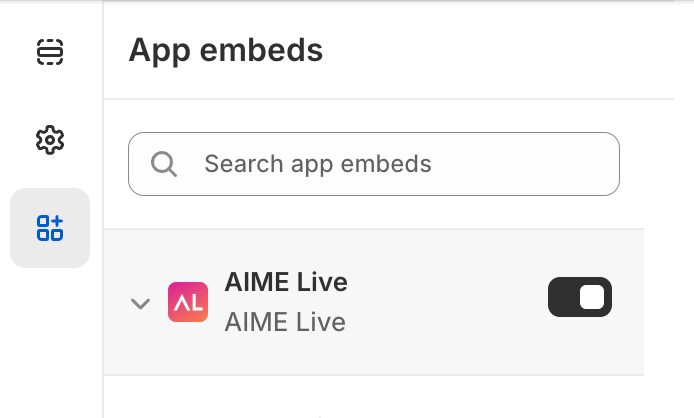
2. Make sure the AIME Live toggle is turned **on**.
3. Make sure you click ‘**save**’, then return to the AIME Live Dashboard in Shopify Admin to make your first Block.
### Create your first Block using the Block Editor
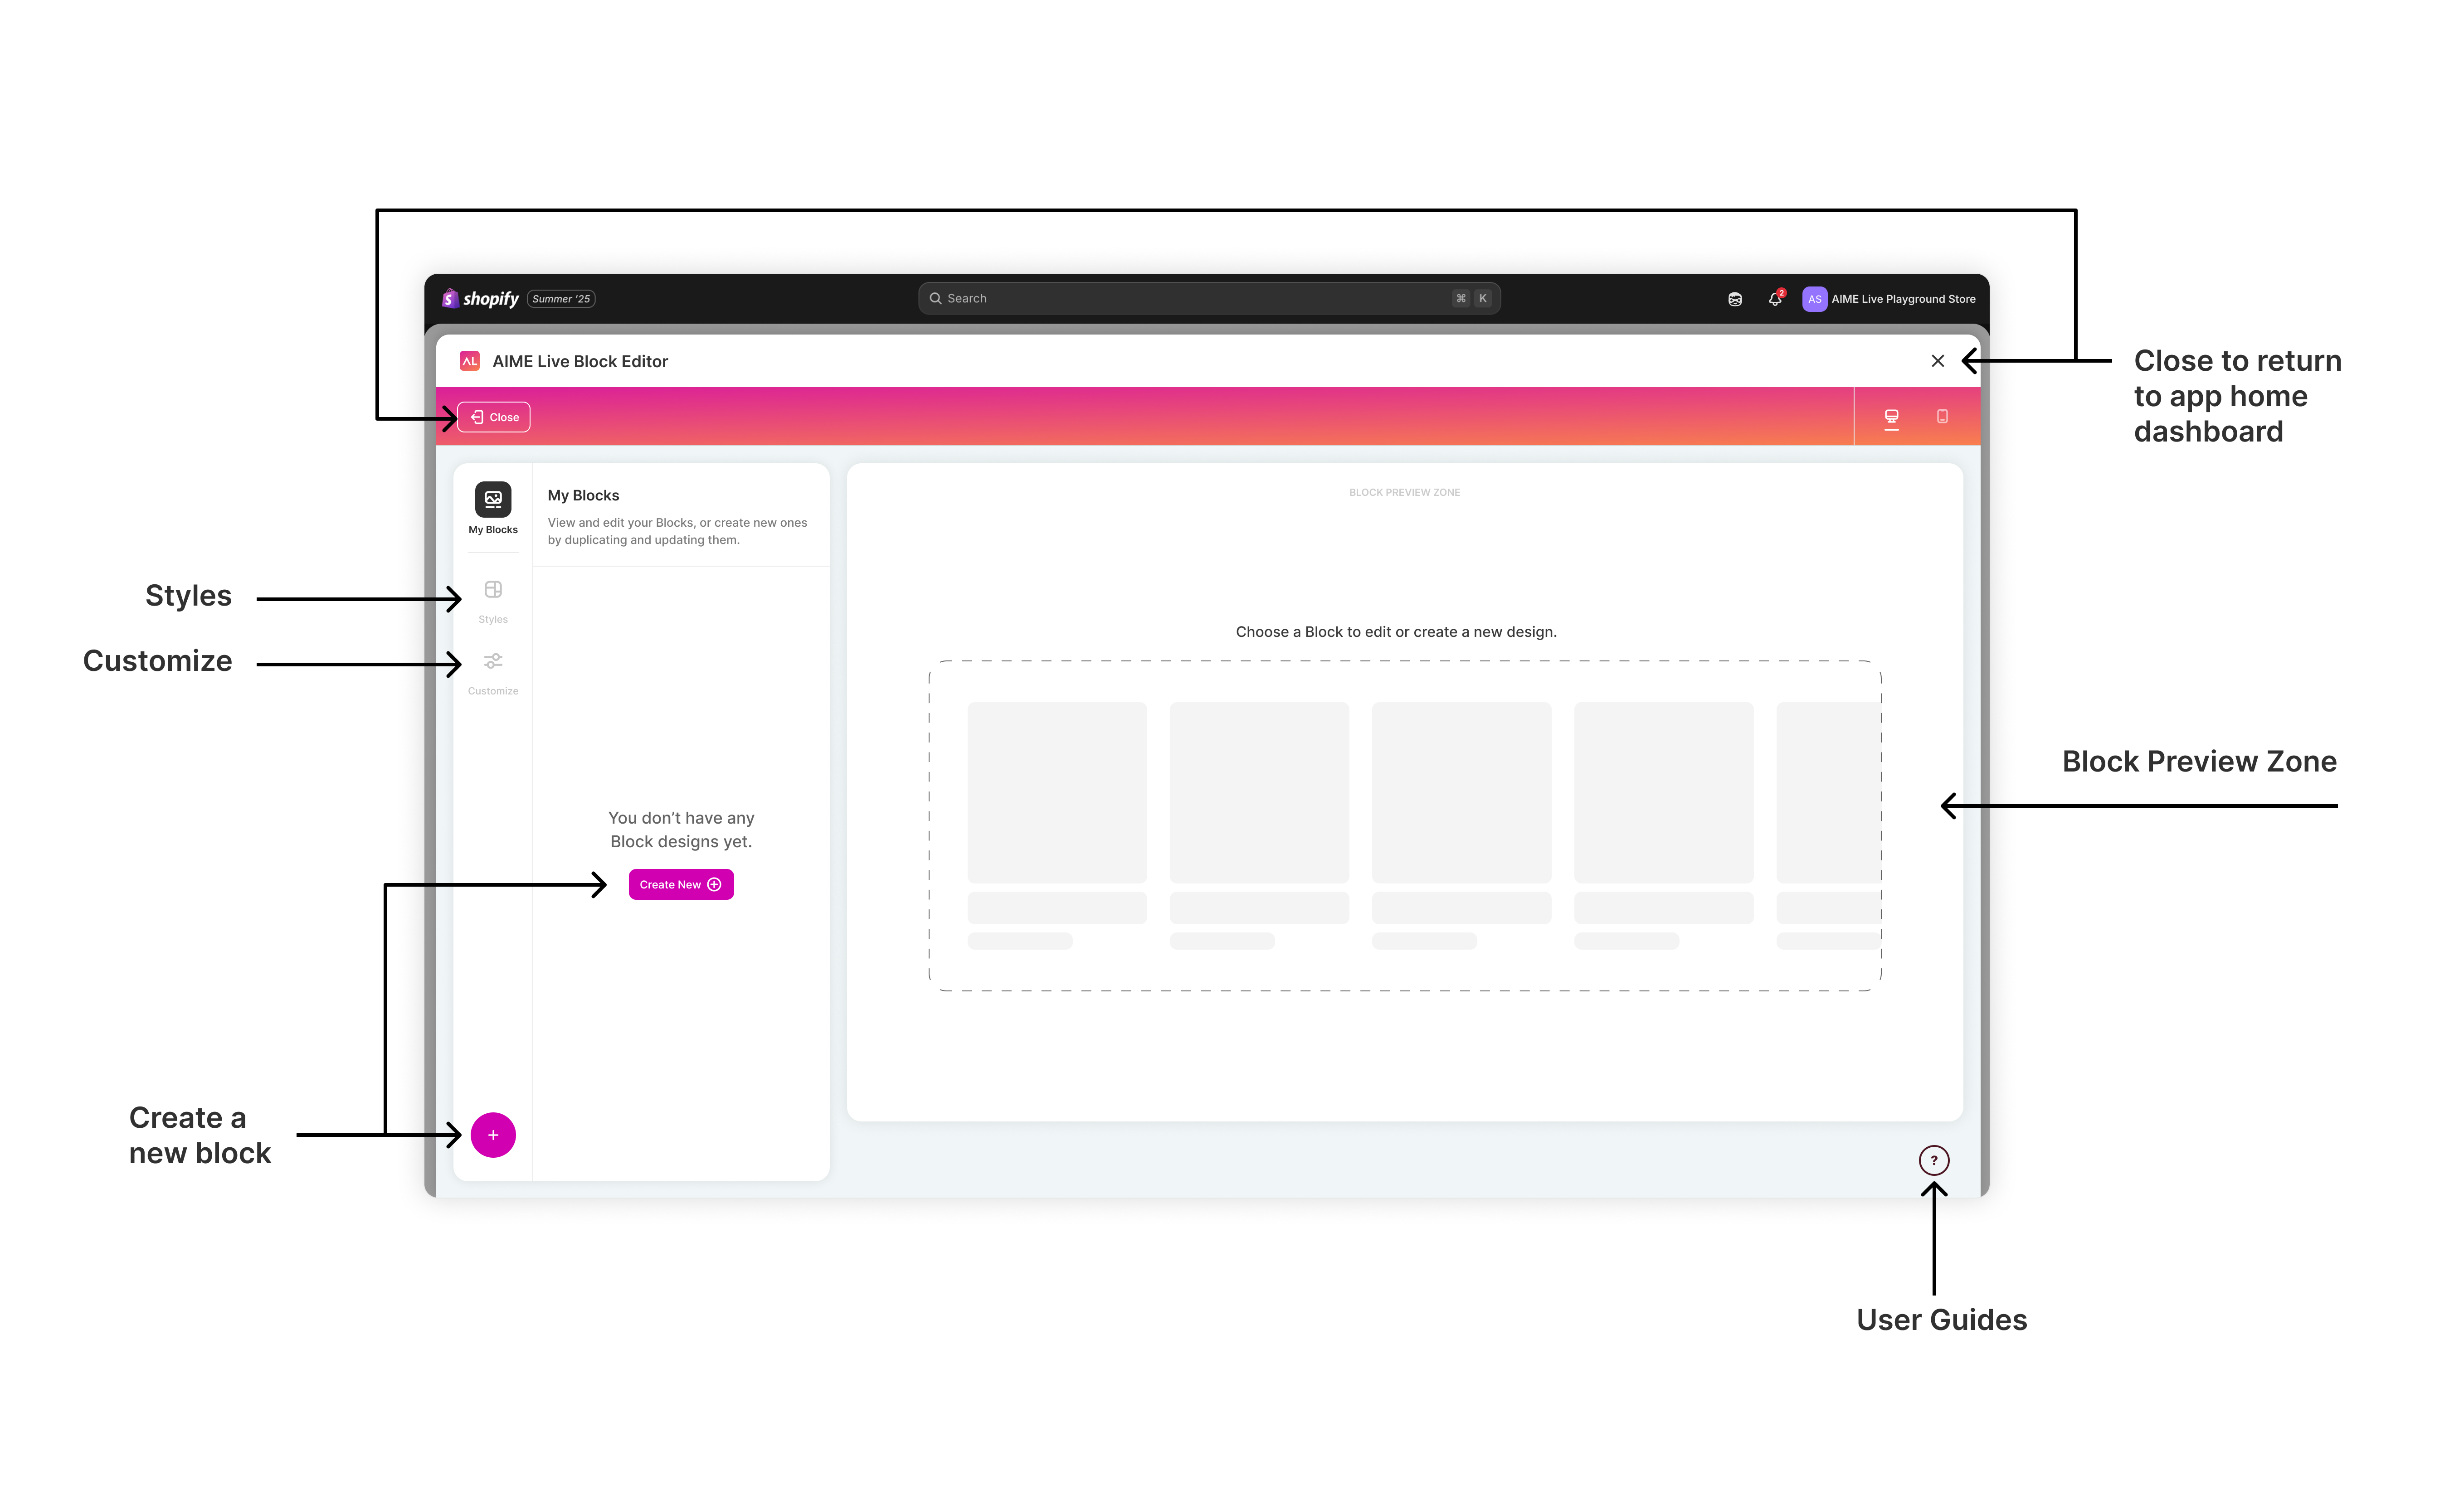
1. Create and customise your first recommendation Block using the **Block Editor**. You can create as many Blocks as you need and style them to suit your store design. Revisit and edit at any time. \
To open the Block Editor, use either the big pink/orange button at the top right-hand side of the AIME Live Dashboard, or the button in the 'Create a Block' modal.
2. Once in the Block Editor, use the pink '**+**' button or select '**Create New**' and follow the prompts to create a Block.
3. Make any customisations in the 'Customise' tab.
4. Once you're happy with your Block design, make sure you select '**save**' and close the Editor.
### Add a Block to your store
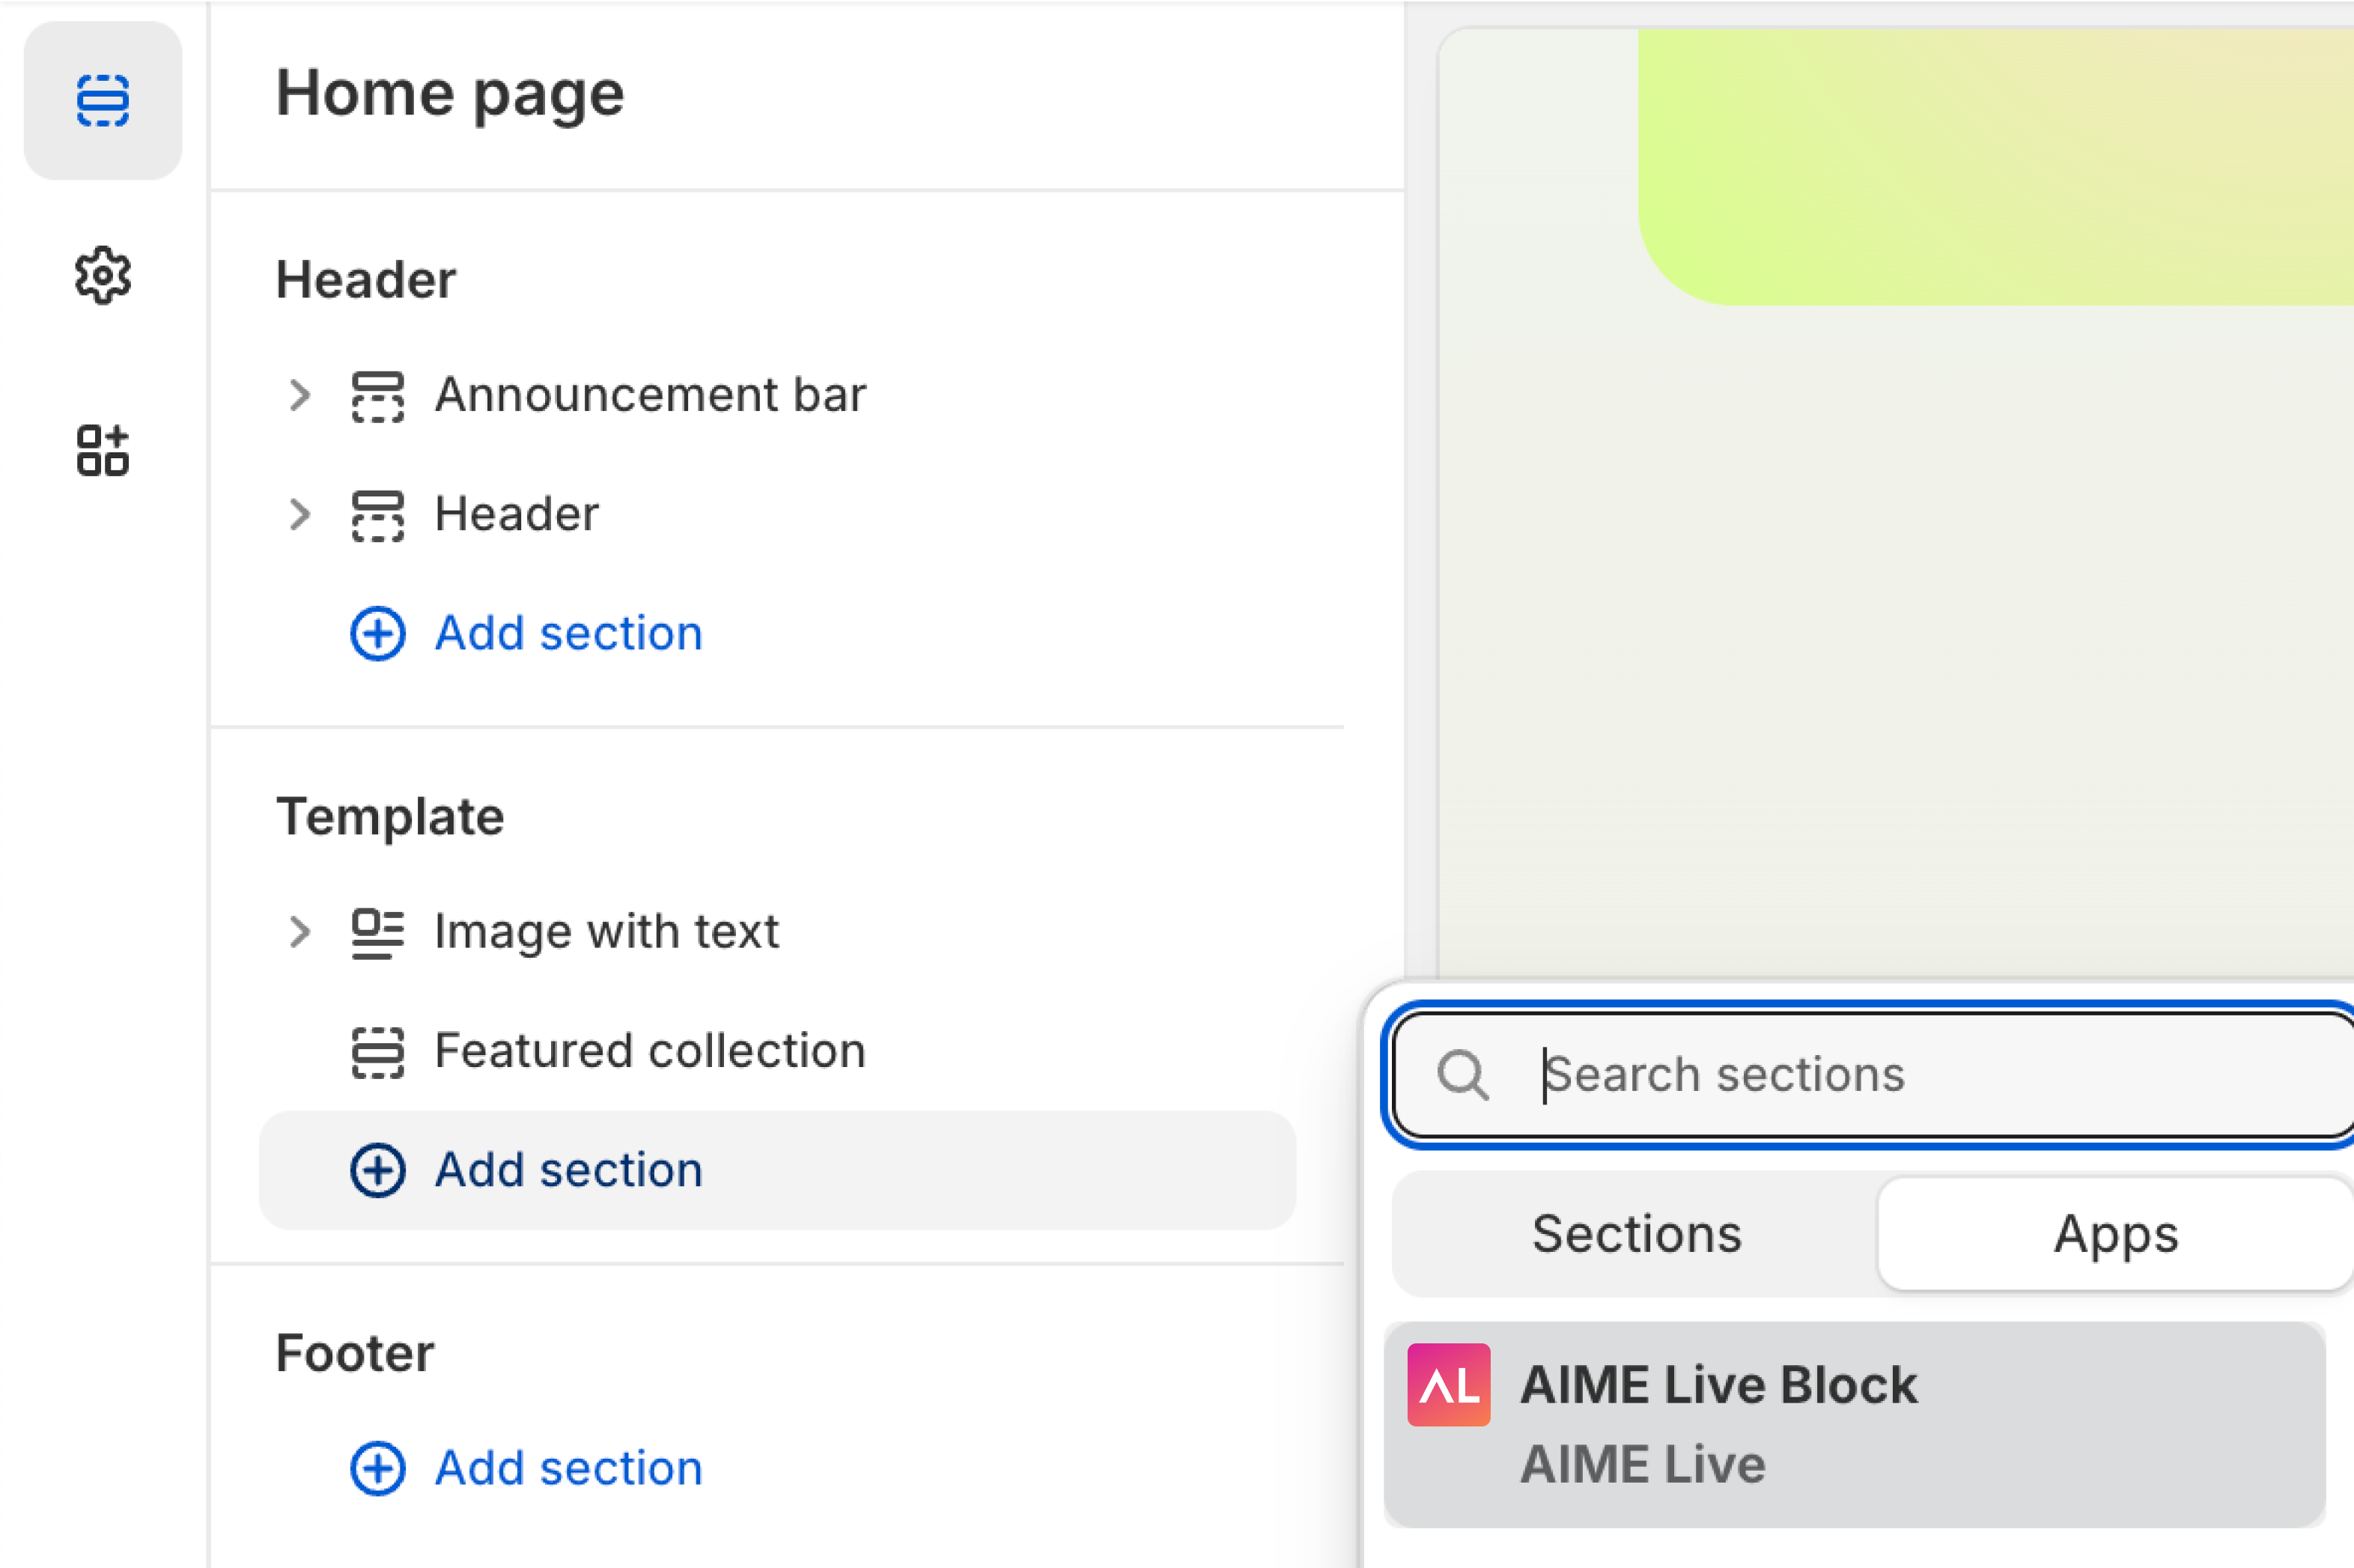
1. Choose the page you want your Block to be added to in the Shopify Theme Editor and identify where you want to place it by adding a section.
2. In the 'add section' menu under the 'Apps' tab, select 'AIME Live Block'.
3. Using the right sidebar, choose which Block you want to display in your new section.
4. Make sure you click 'save' when finished. Your Block will display unique, personalized product recommendations to shoppers when they start interacting with your store.
More detail on how to add a Block to your store can be found [here.](#add-a-block-to-your-store)